No matter what size generator you have, the method may be adapted to work with it.
The average modern generator (with the obvious exception of inverter generators), can get quite loud. After erecting a soundproof enclosure, the resulting decibel levels will rival those of the most expensive generators on the market.
This generator shed methods of soundproofing can be applied to muffle an air compressor as well.
One of these generator sound reduction storage boxes can be built with minimal effort, despite common opinion to the contrary.
Why Do You Need a Storage Box / Shed
There is one important question I need answered before we go any farther. I think it is pretty obvious why you would need one but these are the most common arguments in favor of sheltering your generator in a shed.
The volume has to be lowered
As important as it is to lessen the quantity of carbon dioxide that enters our already damaged ecology, it is equally important to lessen the noise levels created by domestic and business generators and other exhaust-producing machines. Our current solution, using portable generators, is very noisy. You should keep a safe distance when working with them. To reduce the noise emanating from the generators, enclosing them in a soundproof baffle box is a viable option.
Security against robbery
The likelihood of having your generator stolen increases significantly if you leave it unattended. Theft is more likely if it is kept where it may be easily taken. Enclosing it gives you peace of mind that it is safe and secure and discourages would-be thieves.
Clearing the decks
Putting those loud, bulky generators in a shed away from sight could free up some space on your land. Even if you already have a spot for your generator, enclosing it outside can help you make better use of the space inside your garage.
Security from the elements
Corrosion and rust can form if you leave your generator out in the elements without covering it. Therefore, it is essential to construct a sturdy generator enclosure to keep your generator safe from the elements. The largest obstacle to the generator’s operation is weather, specifically rain, snow, wind, and sun, if it is not protected from it the generator will not last as long as you would hope.
What Kinds of Building Options Are There?
There are numerous viable solutions for building a shelter for your portable generator. There are basically three options out there for you to build from. You can make it whatever shape or size you like.
Dirt or grass
It doesn’t matter if the generator cage is set up on turf or dirt. This is the quickest and easiest method for constructing a shelter for a generator. But it can have some drawbacks. Think about how your time and money are currently allocated and adjust accordingly before making a final decision. Typically, you will place your generator shed on a pair of PT 4x4s. If possible, avoid a location with compacted soil and instead opt for one that has plenty of air circulation and drainage. Packed dirt poses a threat because it prevents air circulation and could cause a pool of water to flood the generator after a heavy downpour.
Gravel
A gravel pad is a second possible location for your generator shed. This approach has the advantage of preventing generator contact with water. Because of drainage issues or erosion, the generator could be corroded by water. Gravel may reduce the likelihood of this harm occurring.
Concrete
The third option provides a level surface for putting your generator’s housing. If you are on a strict budget or have a limited income, this might not be the best option for you. But the concrete surface is helpful and doesn’t demand too much extra effort. The generator shed made on a concrete floor will likely last longer.
Here are seven things to think about when designing a silent box for your generator
When designing the quiet generator box, seven factors could be considered.
- The silent generator box must attenuate at least half of the generator’s noise. As you can imagine, the main benefit of a generator storage shed is you may significantly lessen the volume of outside noise by more than half if built correctly.
- Since the silent generator box will likely only be utilized during extended blackouts, it needs to be easily disassembled so that it may be stored in the smallest possible area. Also if you have a portable generator you want to maintain the advantages of the portability.
- The box should be easy to assemble and disassemble without too much fuss.
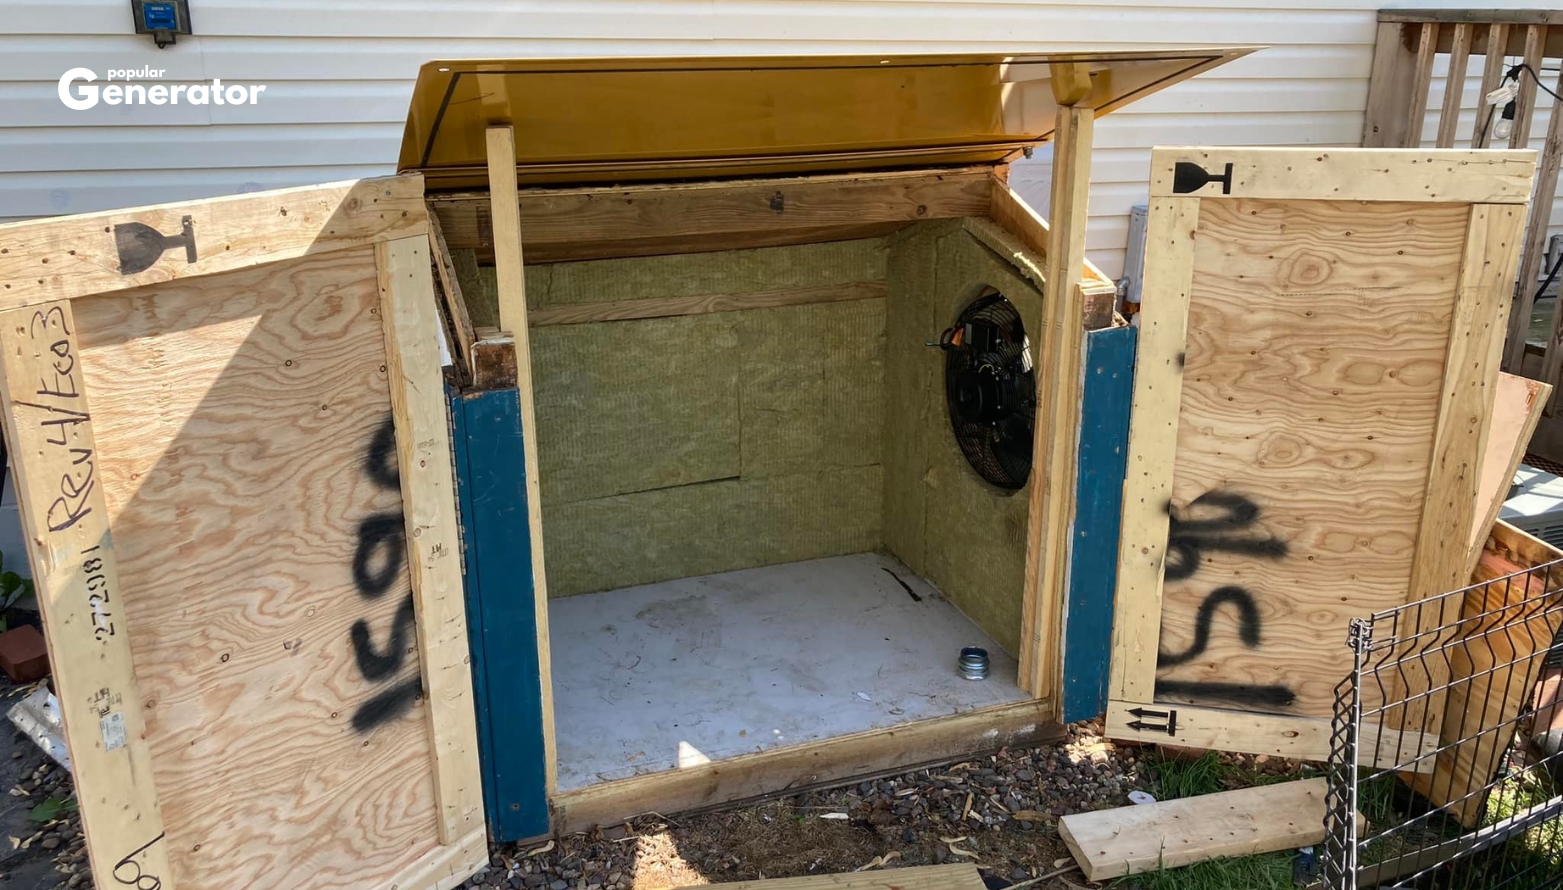
- The generator sheds surfaces must be sealed so that no sound can escape.
- Vents for incoming and outgoing air are essential for effective cooling.
- The generator must be able to operate in a small space, out of the elements, without producing dangerous amounts of carbon monoxide that could affect the health of the residents or the surrounding community.
- The generator box should be constructed in a modular fashion so that different types of soundproofing materials and ventilation systems can be added as needed.
Questions on building materials
It’s important to remember that you can’t just go out and buy whatever parts and pieces you want without first getting some solid background information and direction. Be careful when picking out the boards, especially if you’re buying the lumber. The boards must be uniform in color and texture and free of defects like warping, splitting, knots, or twists.
You could have saved yourself a lot of hassle and money by being extra cautious before purchasing cedar or other weatherproof lumber for your enclosure. If the procedure is flawed, the final product will not be symmetrical or visually appealing. That’s why it’s important to do some work and make sure everything is lined up properly and looks good before you start putting it together.
Once you have addressed all of the safety issues, made a list of all of the accessories, estimated how long it will take, and calculated how much it will cost, you can begin the step-by-step procedure to build a compact generator enclosure.
How to Make a Portable Generator Storage Box
Make sure your generator is measured. You should be generous with the dimensions of the enclosure so that your generator has enough room to operate. Ten inches of clearance is recommended on the sides, front, and back.
Rough it out on paper. In order to service and refuel the generator, you will need to build a small “shed” with a flat roof and a door. Vents with louvers will be installed on the sides and rear of the generator. While the pressure-treated 4×4 is supporting the two longitudinal sides, it will provide you with some space for running electric lines.
- Use your dimensions to cut the top, sides, front, and back pieces of plywood.
- Find the end or side that the generator’s exhaust will heat. Cover the inside of this with sheet metal or aluminum flashing and fix it with machine screws.
- Attach the louvers to the rear and sides and mark the cutting lines.
- Once the slits have been cut in the louvers, they should be tapped into place. Metal shears or tinsnips may be required to cut through the metal on the heat-protected side.
- Cut the 2x2s to the height of the generator baffle box’s top sides. These parts are secured to the inside of each side with deck screws.
- Cut the 4x4s so that they fit into the side of the generator’s housing. Attach the side panels to the 4x4s using L brackets. Check that the louvers are open. If you go the wheels and 2x4s route, don’t forget to use deck screws to secure the generator box’s sides to the lumber. When the right hardware is used, the wheels can be attached to the sides. You might also choose to attach a couple of wheelbarrow handles to the side for convenience while transporting heavy loads.
- Once you’re satisfied with the placement, use L brackets at the top and bottom of each side to secure the generator enclosure’s back to the sides. Changing out the latches and hinges is an option. This can be done to increase airflow by opening up the exhaust end.
- Attaching the generator cage’s “door” to its side walls with hinges is step 8. The door needs two latches, one at the top and one at the bottom. Close and latch the doors.
- The generator box’s top must be secured to the sides using deck screws.
- If a roof is being used, it should be attached to the top of the enclosure.
- Let the external coating of the generator shed dry after application.
- And finally step 12, to keep your generator safe, roll it inside and fasten the doors. Preserved with care until it’s time to use!
It’s much easier to start and feed your generator if you remove it from the baffle box. The generator’s cables should be hooked up before it’s moved inside its housing.
If you’re building an enclosure for a large generator, expect this job to take more than two hours. For this reason, it’s best to take your time while coming up with a design and making any necessary revisions, as each generator is one of a kind.
Best generator sheds
If you don’t feel like building a shed for your generator, here are some options you might consider buying instead.
")
")

")
")
Conclusion
Soundproofing a generator at home will save you a tonne of money compared to buying one of the commercially available boxes. I hope you found this useful for your upcoming home improvement initiatives.

Write Your Review
No reviews yet. Be the first to share your experience!